Tag: Beginners

  • Film Making Tips for Beginners

    Film Making Tips for Beginners

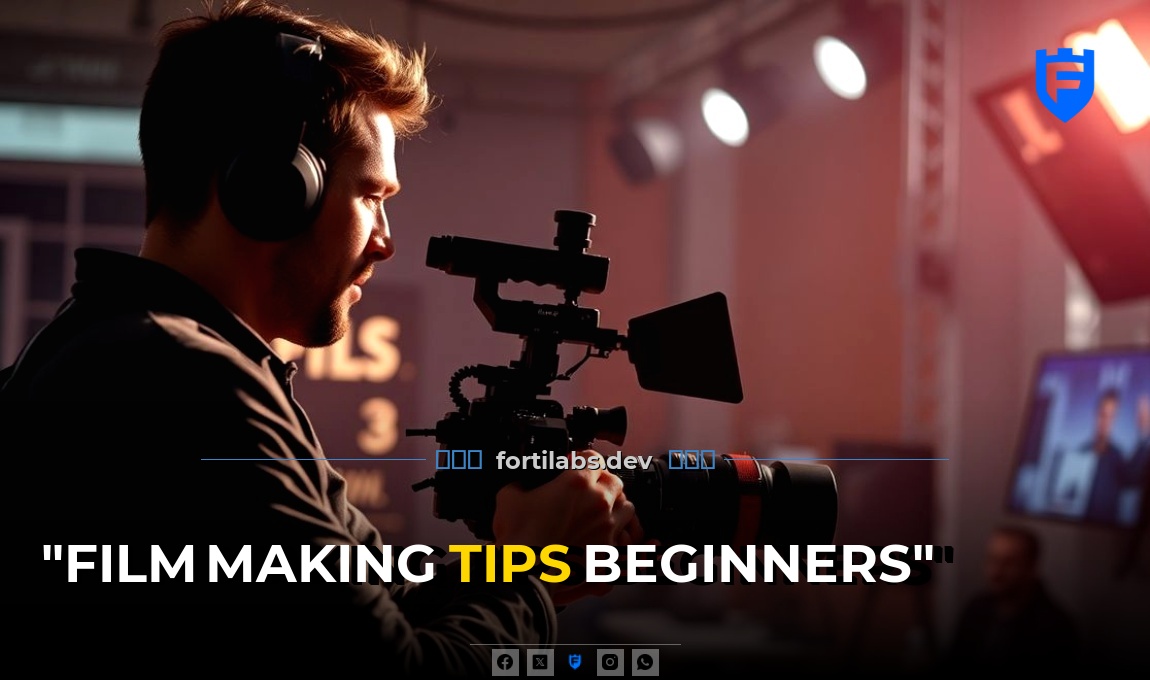
    Did you know that over 70% of YouTube’s daily watch time comes from mobile devices? This means that if you’re just starting out in filmmaking, you’ve got a huge audience right in your pocket. I’ve helped hundreds of people dive into filmmaking, and I’m excited to share some tips to get you started.

    Gear Up the Right Way

    You don’t need the fanciest equipment to start. In fact, some of the best films have been shot on smartphones. Here’s what I recommend:

    • Camera: Start with what you’ve. A smartphone with a good camera is a great beginning. If you want to invest, look into entry-level DSLRs or mirrorless cameras. They offer more control and better image quality.
    • Audio: Good audio is often more important than good video. Invest in a basic lavalier microphone or a shotgun mic to capture clear sound.
    • Lighting: Natural light is your best friend. Learn to use it effectively. If you need artificial light, start with a basic three-point lighting setup. You can find affordable LED panels online.
    • Tripod or Stabilizer: Shaky footage can be distracting. A tripod or a gimbal stabilizer will help you capture smooth shots.

    Step-by-Step: Choosing Your First Camera

    Here’s how I guide my students through choosing their first camera:

    1. Set a Budget: Decide how much you’re willing to spend. Remember, you don’t need the most expensive camera to start.
    2. Research: Look up reviews and comparisons online. Websites like DPReview and YouTube channels like Peter McKinnon offer great insights.
    3. Consider Your Needs: Think about what you want to shoot. Different cameras excel in different situations.
    4. Try Before You Buy: If possible, rent or borrow the camera before purchasing. This way, you can get a feel for it.
    5. Make a Purchase: Once you’re sure, go ahead and buy. Don’t forget to invest in a good memory card and a backup battery.

    Master the Basics of Storytelling

    Film is all about telling a story. Even if you’re shooting a short clip for social media, you need a beginning, middle, and end. Here’s how I break it down:

    • Concept: Start with a simple idea. It could be a personal story, a fictional narrative, or even a tutorial.
    • Script: Write a basic script or at least an outline. This will serve as your roadmap.
    • Storyboard: Sketch out your shots. This doesn’t have to be fancy. Stick figures and simple diagrams work just fine.
    • Characters and Dialogue: If you’re working with actors, help them understand their characters and the scene.

    Step-by-Step: Writing a Simple Script

    Here’s the process I use when writing a script:

    1. Ideas: Jot down all your ideas, no matter how silly they seem. You can refine them later.
    2. Outline: Create a basic outline. This should include the beginning, middle, and end of your story.
    3. Dialogue: Write the dialogue. Keep it natural and concise.
    4. Descriptions: Add descriptions of the scenes and actions. This will help your actors and crew understand what you want.
    5. Revise: Revise your script multiple times. Read it out loud to see if it flows well.

    Learn the Technical Stuff

    Understanding the technical aspects of filmmaking can seem daunting, but it’s must-have. Here are some basics to get you started:

    • Camera Settings: Learn about ISO, shutter speed, and aperture. These settings control the exposure and look of your footage.
    • Composition: Use the rule of thirds, leading lines, and other composition techniques to make your shots more interesting.
    • Editing: Editing is where your film comes to life. Start with simple software like iMovie or Windows Video Editor. As you improve, you can move on to more advanced software like Adobe Premiere Pro or Final Cut Pro.
    • Color Grading: Color grading can dramatically change the mood of your film. Learn the basics to make your footage look more professional.

    Step-by-Step: Basic Camera Settings

    Here’s how I explain camera settings to my beginners:

    1. ISO: Start with the lowest ISO possible. This reduces noise in your footage. Increase it only if you need more light.
    2. Shutter Speed: For a natural look, set your shutter speed to double your frame rate. For example, if you’re shooting at 30fps, set your shutter speed to 1/60.
    3. Aperture: A lower f-number (like f/1.8) gives you a shallow depth of field, which blurs the background and makes your subject stand out. A higher f-number (like f/16) gives you a deeper depth of field, keeping both the foreground and background in focus.
    4. White Balance: Set your white balance to match the lighting conditions. This ensures that the colors in your footage look natural.

    Practice, Practice, Practice

    The most important thing in filmmaking is practice. The more you shoot, the better you’ll get. Here are some ways to practice:

    • Shoot Every Day: Even if it’s just a short clip, try to shoot something every day. This will help you build a portfolio and improve your skills.
    • Experiment: Don’t be afraid to try new things. Experiment with different camera angles, lighting setups, and editing techniques.
    • Learn from Others: Watch films, both good and bad. Try to understand what works and what doesn’t. Analyze their storytelling, cinematography, and editing.
    • Get Feedback: Share your work with others and ask for feedback. This can provide valuable insights and help you improve.

    Step-by-Step: Creating a Practice Schedule

    Here’s how I help my students create a practice schedule:

    1. Set Goals: Decide what you want to achieve. It could be mastering a specific technique or completing a short film.
    2. Create a Plan: Break down your goals into smaller tasks. For example, if you want to improve your editing skills, plan to edit one short clip each week.
    3. Schedule Time: Set aside time each day or week to work on your goals. Treat this time as you’d any other important appointment.
    4. Track Your Progress: Keep a log of what you’ve shot and edited. This will help you see your progress over time.
    5. Review and Adjust: Regularly review your progress and adjust your plan as needed. Don’t be afraid to change your goals or methods if something isn’t working.

    Remember, filmmaking is a journey. It takes time, practice, and patience to improve. But with these tips and a lot of dedication, you’ll be well on your way to creating amazing films. So grab your camera, start shooting, and most importantly, have fun!

  • Showbiz Career Guide for Beginners

    Showbiz Career Guide for Beginners

    I’ll never forget the day I stood backstage at a small local theater, heart pounding, as I watched a friend perform in a play. I’d always thought showbiz was just glamorous fluff, but that night, I saw the passion, the hard work, and the magic. It was then I realized I wanted in. If you’re like me, full of doubt but curious about a showbiz career, here’s your guide to getting started.

    Finding Your Niche

    Showbiz isn’t just one thing. It’s acting, singing, dancing, writing, directing, producing, and more. Your first step is figuring out where you fit. I tried everything—I sang in a local choir, acted in a community theater play, and even wrote a short script. None of it was perfect, but I loved writing the most. You might discover your passion through trial and error, just like me.

    Exploring Your Options

    Start by making a list of what excites you. Here are some common areas:

    • Acting: Theater, film, television, or voice acting.
    • Music: Singing, playing instruments, or producing.
    • Writing: Scriptwriting, songwriting, or journalism.
    • Behind the Scenes: Directing, producing, or stage management.

    Once you’ve narrowed it down, dive in. Take a class, watch tutorials, or join local groups. For example, if you’re interested in acting, join a local theater group. I did, and by June 2022, I’d performed in three plays, which taught me more than any book ever could.

    Building Your Skills

    Talent alone won’t cut it. You need skills, and those come from practice and training. I signed up for a six-week writing workshop in early 2023. It cost me $300, but it was worth every penny. The instructor gave me feedback that helped me improve, and I met people who shared my passion.

    Investing in Education

    You don’t need a fancy degree, but learning from experts helps. Here’s how to get started:

    • Online Courses: Websites like Coursera or MasterClass offer affordable classes.
    • Workshops: Local community centers or colleges often host workshops.
    • Books and Tutorials: Read books or watch YouTube tutorials on your craft.

    Don’t forget to practice daily. Set aside time each day to work on your skills. I wrote every evening for at least an hour, and by the end of six months, I’d written three short scripts.

    Getting Experience

    Experience is everything in showbiz. You won’t land your dream role or gig right away, but every small opportunity counts. I volunteered to write for a local podcast, and though I wasn’t paid, I gained valuable experience and added it to my resume.

    Starting Small

    Look for small gigs to build your portfolio. Here’s how:

    • Local Theater: Join a community theater group.
    • Open Mic Nights: If you’re a musician, perform at open mic nights.
    • Freelance Writing: Offer to write for local blogs or magazines.

    Remember, every big name started small. Taylor Swift played small venues before selling out stadiums. Start where you’re, and work your way up.

    Networking and Marketing Yourself

    You might have talent and experience, but if no one knows about you, it won’t matter. Networking and self-promotion are key. I created a simple website and social media profiles to showcase my work. It took time, but within a few months, I’d connected with other writers and landed a few paid gigs.

    Building Your Network

    Networking isn’t about schmoozing; it’s about building genuine connections. Here’s how:

    • Attend Events: Go to industry events, meetups, or workshops.
    • Join Online Communities: Participate in forums or social media groups.
    • Reach Out: Don’t be afraid to email or message people you admire.

    Also, create a strong online presence. Share your work on social media, start a blog, or create a website. Use platforms like LinkedIn, Instagram, or Twitter to connect with others in your field.

    Marketing Yourself

    You’re your own brand, so market yourself like one. Here’s how:

    • Create a Resume: Highlight your skills and experience.
    • Build a Portfolio: Showcase your best work.
    • Use Social Media: Share updates and engage with your audience.

    Don’t be afraid to promote yourself. Share your achievements, ask for feedback, and celebrate your wins. I posted about my first paid writing gig on social media, and it led to more opportunities.

    Handling Rejection

    Rejection is part of the journey. I’ve been turned down for jobs, had scripts rejected, and faced criticism. It’s tough, but it’s also part of the process. Every “no” brings you one step closer to a “yes.”

    Dealing with Criticism

    Not everyone will love your work, and that’s okay. Here’s how to handle criticism:

    • Listen: Hear what others have to say.
    • Learn: Use criticism to improve.
    • Let Go: Don’t dwell on negative feedback.

    Remember, even the biggest stars face rejection. J.K. Rowling’s “Harry Potter” was rejected by 12 publishers before it was accepted. Keep going, no matter what.

    Showbiz is a journey, not a destination. It takes time, effort, and patience, but if you’re passionate, it’s worth it. Start small, build your skills, gain experience, and network. Most importantly, believe in yourself. I did, and it changed my life. Now, it’s your turn.

  • Easy Art Ideas for Beginners

    Easy Art Ideas for Beginners

    You don’t need a natural talent to create art. I’ve helped hundreds of people create beautiful artwork, and I can tell you that passion and practice matter more than innate ability.

    If you’re a beginner, you might feel overwhelmed by the vast world of art. That’s why I’ve put together some easy art ideas to help you start your creative journey. I’ll guide you through simple, step-by-step processes that have worked for my students.

    Ditch the Perfectionism: Start with Simple Doodles

    One common myth is that art needs to be perfect. Let go of that idea right now. Art is about expression, not perfection. Begin with simple doodles to warm up your creative muscles. Here’s how I teach my students to get started:

    • Grab a pencil and paper – Keep it simple. You don’t need expensive supplies to begin.
    • Draw basic shapes – Start with circles, squares, and triangles. Combine them to create simple objects like houses, trees, or flowers.
    • Add details gradually – Once you’re comfortable with basic shapes, add finer details. For example, turn a circle into a sun by adding rays.
    • Don’t worry about mistakes – Embrace imperfections. They’re part of the learning process.

    I encourage my students to spend 10-15 minutes a day doodling. It’s a relaxed way to build confidence and explore different styles.

    Embrace the Joy of Coloring: From Coloring Books to Freehand

    Coloring is a stress-free way to dive into art. You might think coloring books are just for kids, but they’re a fantastic tool for beginners. Here’s how you can start:

    • Choose a coloring book – Pick a theme you love—animals, mandalas, or landscapes. Let it inspire you.
    • Experiment with colors – Don’t be afraid to mix and match. Use markers, colored pencils, or watercolors to add depth.
    • Move to freehand coloring – Once you’re comfortable, try coloring without outlines. Sketch simple shapes and fill them with color.
    • Play with patterns – Add dots, stripes, or zigzags to make your artwork unique.

    I’ve seen students transform from hesitant beginners to confident artists through coloring. It’s a great way to learn color theory and develop your own style.

    Get Creative with Easy Painting Techniques

    Painting might seem intimidating, but it’s easier than you think. Here’s a simple step-by-step process I use with my students to create beautiful painted artwork:

    Materials You’ll Need

    • Acrylic paints (they’re affordable and beginner-friendly)
    • A canvas or thick paper
    • Paintbrushes in various sizes
    • Water and a palette for mixing colors

    Step-by-Step Painting Process

    • Prep your workspace – Lay down newspaper or a drop cloth to protect your surface. It’s better to be safe than sorry.
    • Choose a simple subject – Start with something basic, like a sunset, a single flower, or a geometric pattern.
    • Sketch your design lightly – Use a pencil to outline your subject on the canvas or paper. Keep it simple.
    • Start with a base color – Fill in the main areas with a base color. Don’t worry about perfection—this is just a starting point.
    • Add layers and details – Once the base color is dry, add layers to create depth. Use darker or lighter shades to define shapes.
    • Experiment with textures – Try different brushstrokes or tools to add texture. For example, use the end of your brush to make dots, or a sponge to create soft effects.
    • Let it dry and step back – Sometimes, the best way to appreciate your work is to look at it from a distance. You’ll be surprised by how much progress you’ve made.

    At first, you might feel like your paintings don’t match what you envisioned, but that’s okay. Every artist goes through this phase. The key is to keep practicing and learning from each piece you create.

    Open up Your Creativity with Mixed Media Art

    Mixed media art combines different materials to create unique and exciting pieces. It’s a great way to experiment and break free from traditional art forms. Here’s how my students and I approach mixed media projects:

    Gather Your Supplies

    • Paper, cardboard, or canvas as your base
    • Acrylic paints, markers, or colored pencils
    • Magazine cutouts, fabric scraps, or pressed flowers
    • Glue, tape, or Mod Podge to attach materials
    • Stickers, washi tape, or other decorative elements

    Create Your Mixed Media Art

    • Start with a background – Paint or color your base with a simple background. It could be a solid color or a pattern.
    • Add texture – Use materials like fabric, paper, or flowers to add texture and dimension to your artwork.
    • Layer your elements – Arrange your materials in a way that feels balanced and harmonious. Play with placement until you’re happy.
    • Secure everything – Use glue or tape to attach your materials firmly to the base.
    • Add final touches – Use markers, colored pencils, or stickers to enhance your design. Add details like doodles, quotes, or patterns.
    • Let it dry and admire your work – Mixed media art often needs time to dry, especially if you’ve used glue or paint. Step back and appreciate what you’ve created.

    I’ve found that mixed media art is a fantastic way to overcome creative blocks. It allows you to experiment without the pressure of creating a “perfect” piece. Plus, it’s a fun way to repurpose materials you already have at home.

    Final Thoughts: Embrace the Journey

    Art is a journey, not a destination. As you explore these easy art ideas, remember that progress takes time. Don’t compare yourself to others or expect instant results. Instead, focus on the joy of creating and the satisfaction of seeing your skills grow.

    I’ve seen so many students transform from hesitant beginners to confident artists. It all starts with taking that first step and embracing the process. So grab your supplies, let your creativity flow, and most importantly, have fun!

    The world of art is waiting for you. What will you create today?